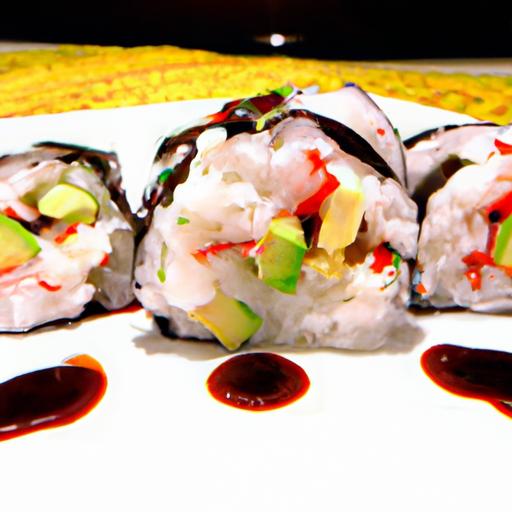
There’s something undeniably magical about rolling your own sushi – the rhythmic dance of spreading seasoned rice, the vibrant allure of fresh fillings, and the satisfying click as your roll takes shape. Crafting homemade sushi rolls isn’t just a culinary adventure; it’s an art form that invites creativity,patience,and a touch of flair. Whether you’re a kitchen novice or a seasoned foodie, this fun, easy, and remarkable guide will unlock the secrets to creating stunning, appetizing sushi right in your own home. Prepare to transform ordinary ingredients into exceptional bites that wow both the eyes and the palate!
Crafting Homemade Sushi Rolls: Fun,Easy & Impressive Guide
Crafting homemade sushi rolls is a delightful journey into flavor,technique,and creativity that transforms fresh,simple ingredients into elegant and visually stunning bites. Rooted in Japanese tradition yet endlessly adaptable, sushi offers a way to exercise both precision and inventiveness in the kitchen. Whether you’re a seasoned pro or a curious beginner,mastering each step-from selecting the freshest ingredients to presenting your rolls with flair-will elevate your sushi experience to extraordinary heights.
Prep and Cook Time
- Preparation: 30 minutes
- Cooking: 20 minutes
- Total Time: 50 minutes
Yield
Serves 4 (makes approximately 8 sushi rolls)
Difficulty Level
Medium – Perfect for adventurous home cooks willing to explore new kitchen skills
Ingredients
- 2 cups sushi rice, rinsed until water runs clear
- 2 1/2 cups water for cooking rice
- 1/3 cup rice vinegar plus 2 tbsp sugar and 1 tsp salt, for seasoning
- 4 sheets nori (seaweed)
- 200g sashimi-grade tuna, thinly sliced
- 1 ripe avocado, sliced thinly
- 1 small cucumber, julienned
- 2 tbsp toasted sesame seeds
- Soy sauce, for dipping
- Pickled ginger and wasabi paste, for serving
- Bamboo sushi rolling mat
Instructions
- Prepare the sushi rice: Rinse the sushi rice under cold water until it runs clear to remove excess starch. Combine rinsed rice and water in a rice cooker or pot, and cook for 15-20 minutes until tender.
- Season the rice: In a small bowl, whisk together rice vinegar, sugar, and salt until dissolved.Gently fold the seasoning into the warm rice using a wooden spatula, fanning the rice at the same time to cool and add shine.
- Lay out your rolling station: Place a bamboo sushi mat on a clean surface. Lay one sheet of nori shiny-side down on the mat.
- Spread the rice evenly: Wet your hands to prevent sticking. Take about a handful of rice and spread it in an even layer over the nori, leaving a 1-inch border at the top edge for sealing.
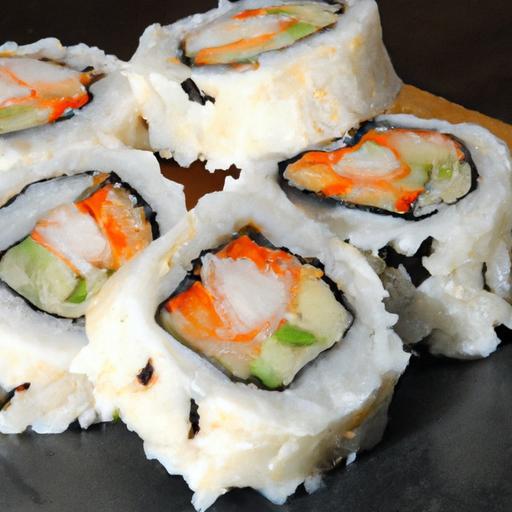
- Add creative fillings: Arrange tuna slices,avocado,and cucumber julienne horizontally across the rice,about 1 inch from the bottom edge. Sprinkle toasted sesame seeds over the fillings for a nutty crunch.
- Roll with precision: Using the bamboo mat, fold the bottom edge up over the fillings. Press and tuck gently to keep fillings tight, then continue rolling firmly but slowly until the nori edge seals the roll.
- Slice and serve: Using a sharp, wet knife, cut the sushi roll into 6-8 equal pieces, wiping the blade between cuts to maintain clean edges.
- Plate with style: Arrange sushi rolls on a beautiful platter. Garnish with pickled ginger, a dab of wasabi, and small dipping bowls of soy sauce.
Tips for Success
- Choosing freshness: Always buy sashimi-grade fish from a trusted source; its quality is paramount to flavor and safety.
- Rice texture: Sushi rice should be sticky but not mushy. Let it cool slightly before spreading for better handling.
- Rolling technique: Keep your rolls tight but gentle to avoid bursting fillings; use the mat’s edges as guides.
- Make-Ahead Options: Prepare sushi rice and slice fillings up to 2 hours in advance. Store fish and avocado separately to maintain freshness.
- Experiment: Try adding pickled radish, spicy mayo, or tempura flakes for unexpected flavor and texture boosts.
Serving Suggestions
Present your homemade sushi rolls alongside a small dipping bowl of quality soy sauce and wasabi to taste. Garnish plates with vibrant pickled ginger and sprinkle additional toasted sesame seeds or thinly sliced scallions for color contrast. Pair with a chilled glass of sake or green tea to complement the delicate flavors. For an elevated flair, serve on a bamboo tray with fresh edible flowers or shiso leaves-an instant impression of elegance and care.
| Nutritional Info (per serving) | Calories | Protein | Carbs | Fat |
|---|---|---|---|---|
| Homemade sushi Rolls | 320 kcal | 18 g | 45 g | 8 g |
Learn more about sushi history and etiquette at Japan Guide.
For further exploration of delicious Japanese dishes, check out our Japanese Rice Recipes collection to deepen your culinary journey.

Q&A
Q&A: Crafting Homemade Sushi Rolls – Fun,Easy & Impressive Guide
Q1: why should I try making sushi rolls at home instead of buying them?
A1: Making sushi at home transforms a delicious meal into a creative experience! Not only do you get to customize every ingredient to your personal taste,but you also save money and impress your friends with your culinary skills. Plus, it’s a great way to bond with family or friends – rolling sushi is as fun as eating it!
Q2: what basic ingredients do I need to start making sushi rolls?
A2: Start with the essentials: sushi-grade rice, nori (seaweed sheets), rice vinegar, sugar, and salt for seasoning the rice. For fillings, popular choices include fresh fish (like salmon or tuna), cucumber, avocado, crab sticks, and cream cheese. Don’t forget your trusty bamboo rolling mat to get that perfect roll!
Q3: How do I prepare sushi rice so it’s sticky and flavorful?
A3: Cooking sushi rice is an art! Rinse the rice well until the water runs clear to remove excess starch, then cook it with a bit less water than usual for firmness. While still warm, season it evenly with a mix of rice vinegar, sugar, and salt. gently fold the mixture and let it cool to room temperature-you want sticky, shiny rice ready to hold your roll together.
Q4: I’m intimidated by rolling sushi. Any tricks to make it easier?
A4: Don’t worry, practise makes perfect! Lay your nori shiny-side down on the bamboo mat, spread rice evenly but not too thick (leave a small border), then layer your fillings near one edge. Use the mat to lift the edge closest to you and roll forward firmly but gently. Keep it tight but avoid squishing. Try a few rolls and you’ll soon be a sushi-rolling pro!
Q5: Can I make sushi rolls vegetarian or vegan?
A5: Absolutely! Sushi is wonderfully versatile. Swap fish for crunchy veggies like asparagus, sweet bell peppers, or pickled radish. Cream cheese can be replaced with tofu or avocado for creaminess. Even fruits like mango or strawberries can add a fresh twist. With endless veggie combos, your sushi plate can be vibrant and vegan-friendly.
Q6: How do I serve and enjoy homemade sushi for maximum wow-factor?
A6: Presentation is half the fun! Slice your rolls into bite-sized pieces with a very sharp knife dipped in water to prevent sticking. Arrange them neatly on a platter, garnish with pickled ginger, wasabi, and a small dish of soy sauce for dipping. For an added touch, sprinkle toasted sesame seeds or drizzle spicy mayo. Gather your friends and savor the reward of your artistic and tasty creations!
Q7: What’s a fast tip for storing leftovers?
A7: Sushi is best enjoyed fresh, but if you must store leftovers, wrap them tightly in plastic wrap and keep refrigerated for up to 24 hours. Avoid letting the rice dry out by keeping it well-covered. When ready to eat, let rolls come to room temperature for the best flavor and texture.
Ready to roll? With these tips in hand, your homemade sushi journey will be as fun as it is delicious-let your creativity shine, one roll at a time!
Concluding Remarks
With your newfound skills and a bit of creativity, crafting homemade sushi rolls transforms from a daunting task into a delightful culinary adventure.Whether you’re rolling up a simple cucumber maki or experimenting with bold, personalized fillings, each bite tells a story of patience, precision, and passion. So gather your ingredients,invite a few friends,and let your kitchen become a vibrant sushi bar where fun meets flavor. Remember, the art of sushi is as much about enjoying the process as it is about savoring the result-happy rolling!