There’s an undeniable magic in the crusty crackle of a freshly baked European loaf-a symphony of tradition, technique, and time-honored ingredients coming together in perfect harmony. From the rustic baguettes of France to the dense, hearty rye breads of Germany, European bread-making is an art form steeped in centuries of culture and craftsmanship. But mastering this tasty craft isn’t just about following a recipe; it’s about understanding the nuances that elevate simple dough into a masterpiece. In this article, we unveil essential tips from across the continent to help you unlock the secrets behind Europe’s most iconic breads-so you can bring a slice of old-world charm to your own kitchen.
Master the Art: Essential European Bread-Making Tips Unveiled is your gateway to unlocking the rich, aromatic world of European baking traditions. From the hearty rye grains of Scandinavia to the silky-smooth softness of Italian semolina flours, exploring these flour varieties reveals complex flavors and textures that elevate your bread beyond everyday loaves. Let’s dive into the secrets that ensure your crust achieves that perfect crackle while the crumb remains delightfully tender,all thanks to time-honored fermentation and expert kneading techniques.
Prep and Cook Time
- Preparation: 30 minutes
- Bulk Fermentation: 3-4 hours (or overnight for slow fermentation)
- Proofing: 1-1.5 hours
- Baking: 35-40 minutes
- Total Time: Approximately 5-6 hours (including fermentation)
Yield
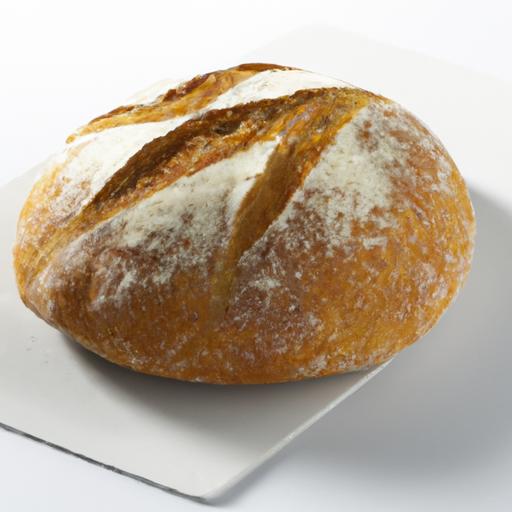
- One medium-sized artisan loaf (about 800g/1.75 lbs)
Difficulty Level
- Intermediate - requires patience and attention to fermentation and shaping
Ingredients
- 500g European bread flour blend (60% strong white wheat, 20% rye, 20% whole wheat)
- 350ml lukewarm water (about 25-27°C / 77-80°F)
- 10g fine sea salt
- 7g active dry yeast or 15g fresh yeast
- Optional: 1 tbsp olive oil for added tenderness (especially for rustic Italian styles)
Instructions
- Activate the yeast by dissolving it in half of the lukewarm water along with a pinch of sugar. Let it sit for 5-10 minutes until frothy and bubbly, signaling that it’s alive and ready.
- Combine the flours and salt in a large mixing bowl. Gradually pour in the yeast mixture followed by the remaining water. Use a wooden spoon or your hands to mix until all ingredients form a shaggy dough.
- knead the dough on a lightly floured surface for about 10 minutes until it becomes smooth and elastic. This step aligns gluten strands, contributing to a strong crumb and crust. If the dough feels sticky, add small amounts of flour-one tablespoon at a time.
- Bulk fermentation: Transfer the dough to a lightly oiled bowl, cover with a damp cloth or plastic wrap, and leave it to rise in a warm place for 3 to 4 hours until doubled in size. For deeper flavor, refrigerate overnight for slow fermentation and bring to room temperature before shaping.
- Shape your loaf: Turn the dough gently onto a floured surface. Use the expert shaping technique by folding the dough edges toward the center,tightening the surface without deflating the air bubbles. Create tension by cupping your hands and rolling the loaf under slight pressure.
- final proof: Place the shaped loaf seam-side down in a banneton or bowl lined with a floured linen towel. Cover and let it proof for 60 to 90 minutes until puffy but not overly risen.
- Preheat your oven to 230°C (450°F) about 30 minutes before baking.Place a baking stone or heavy tray on the middle rack and a separate shallow pan on the bottom for steaming (water vapor is crucial for a stunning crust).
- Transfer the loaf onto parchment paper or a peel, score the top using a sharp blade to create controlled expansion points, then slide it onto the hot stone. Quickly pour a cup of hot water into the steam tray and instantly close the oven door.
- Bake for 20 minutes at 230°C (450°F) with steam, then remove steam tray and lower heat to 200°C (390°F). Continue baking for another 15-20 minutes or until crust turns a deep golden brown and the loaf sounds hollow when tapped.
- Cool completely on a wire rack before slicing to let the crumb set and avoid gumminess.
Tips for Success
- Flour blends: Experiment with ratios of rye, spelt, and wheat to discover your preferred flavor and texture. Rye imparts a subtle earthiness and dense crumb, while wheat offers that airy softness.
- Hydration: European artisan breads frequently enough have a higher hydration (70-75%) for an open, moist crumb, but beginner bakers might start at 65% for easier handling.
- Fermentation patience: Slow, cold fermentation enhances flavor complexity. Try refrigerating dough overnight to develop subtle sour notes akin to sourdough without the starter.
- Kneading tip: Use the “windowpane test”-stretch a small ball of dough thinly; if it can stretch without tearing and light shines through, your gluten is well-developed.
- Use steam: Injecting steam in the oven keeps the crust flexible during initial baking, allowing better oven spring and that signature crackling crust.
serving Suggestions
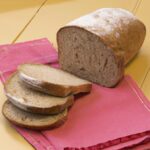
- Slice thick and serve warm with creamy European cheeses like aged gouda or tangy goat cheese to highlight the crumb’s subtle nutty notes.
- Accompany with high-quality olive oil and a sprinkle of flaky sea salt for a rustic starter experience.
- For a heartier meal, try it alongside a robust lentil stew or a classic vegetable potage to emphasize the bread’s chewy texture.
- Garnish with fresh herbs like rosemary or thyme to lend aromatic bursts that complement the bread’s flavor.
| Nutritional Info per Slice | Amount |
|---|---|
| Calories | 180 kcal |
| Protein | 6g |
| Carbohydrates | 36g |
| fat | 1.5g |

For more in-depth techniques on shaping European loaves, explore our comprehensive shaping guide. To deepen your fermentation knowledge,the King Arthur Baking sourdough guide is a treasure trove of science and tradition perfectly aligned with mastering your bread’s flavor journey.
Q&A
Q&A: Master the Art: Essential european Bread-Making Tips Unveiled
Q1: What makes European bread unique compared to other types of bread?
A: European bread is frequently enough celebrated for its deep-rooted traditions, artisanal techniques, and natural fermentation processes. Unlike many commercial breads, European loaves typically emphasize crusty exteriors, open crumb structures, and nuanced flavors developed through slow fermentation, using minimal ingredients-often just flour, water, salt, and natural leavening agents.
Q2: How importent is the choice of flour in European bread-making?
A: Flour is the foundation of any bread, and in Europe, its selection is treated with great care. Different regions use specific wheat varieties that influence texture and taste. Such as, French bread often relies on a strong bread flour for that perfect chew, while Italian breads might incorporate softer flours. Understanding the protein content and grind of your flour will considerably impact your loaf’s structure and flavor.
Q3: What role does fermentation play in creating classic European bread?
A: Fermentation is the soul of European bread. It not only leavens the dough but also develops flavor complexity and enhances digestibility. Customary methods frequently enough use natural starters like sourdough cultures,which ferment slowly over hours or even days. This slow fermentation allows enzymes to break down starches and gluten, producing that signature tang and rich aroma.
Q4: Can I recreate authentic European bread at home without professional equipment?
A: Absolutely! While professional bakers use stone ovens and specialized tools, home bakers can achieve fantastic results with a few smart adjustments. Using a Dutch oven or baking stone mimics the intense heat and steam of a bakery oven, helping develop that coveted crispy crust.Also, embracing techniques like stretch-and-fold for gluten advancement can replace commercial mixers.
Q5: What are some essential shaping techniques to know for European breads?
A: Shaping is crucial as it controls the final loaf’s texture and appearance. Many European loaves feature tight, well-formed shapes that trap air pockets and contribute to an open crumb. Techniques include gentle folding to build tension, careful rolling for baguettes or batards, and scoring with a razor blade to allow controlled expansion during baking-each region has its distinctive style.
Q6: How does hydration level influence European bread texture?
A: Hydration-the ratio of water to flour-is a key factor. Higher hydration doughs (70% and above) are common in rustic European breads like ciabatta and focaccia,resulting in moist,open crumbs and chewy crusts. Conversely, leaner doughs with less water produce firmer, denser loaves like classic French boules. Experimenting with hydration allows you to tailor texture and crumb to your liking.
Q7: What tips can help perfect the crust of european bread at home?
A: To achieve that iconic crust, steam is your best friend. Introducing steam in the first 10-15 minutes of baking keeps the crust moist,allowing the bread to expand before becoming crisp. At home, create steam by placing a pan of hot water in the oven or misting the oven walls with water. also,baking on a preheated surface like a stone helps develop even heat distribution for a golden,crackly crust.
Q8: How do traditional European bakers naturally leaven their bread without commercial yeast?
A: Traditional European bakers frequently enough use sourdough starters-fermented mixtures of wild yeast and lactobacilli gathered from the surroundings. This natural leavening creates a slower rise, developing richer flavors and better shelf life. Starting your own sourdough culture may take a few days, but it connects you to centuries-old baking heritage and imparts unique taste nuances.Q9: What common pitfalls should beginners avoid when making European-style bread?
A: A few classic mistakes can undermine your efforts: overworking dough can make bread tough; underproofing leads to dense texture; neglecting to score the dough may cause unpredictable bursting in the oven; and skipping steam can result in a dull, soft crust. Patience,gentle handling,and attention to fermentation times ensure your bread turns out beautifully.
Q10: Where can I find inspiration to explore different European bread styles?
A: Europe’s bread heritage is vast and varied-from the slender baguettes of France and hearty German rye breads to the airy Italian ciabatta and Hungary’s rustic pogácsa. Exploring regional recipes, watching artisanal bakers, or even visiting local bakeries (virtually or in person) can spark your creativity and deepen your thankfulness for this timeless craft.
In Conclusion
As the warm aroma of freshly baked European bread fills your kitchen, you’re no longer just a baker-you’re a storyteller preserving centuries of tradition, one loaf at a time. Mastering these essential tips transforms routine baking into an artful journey, connecting you to the rich cultural tapestry behind every crust and crumb. So, embrace the patience, savor the process, and let each knead and rise bring you closer to bread perfection. Your explorer’s spirit and newfound techniques will ensure that every bite tells a delicious story worth sharing. Happy baking!