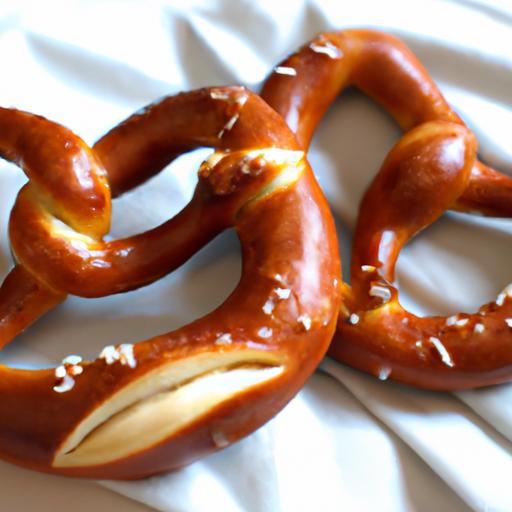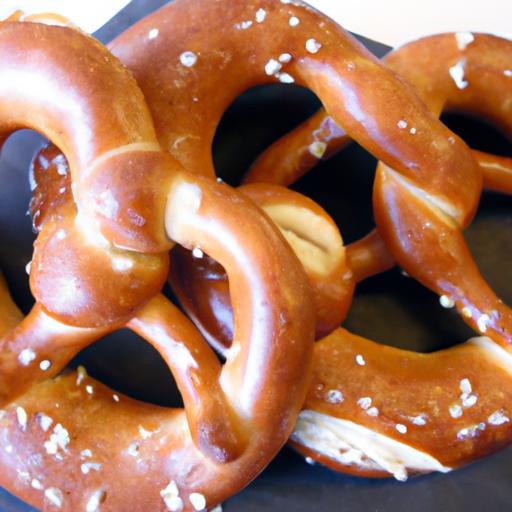
There’s something utterly irresistible about the warm,golden embrace of a perfectly baked German pretzel-a delightful harmony of soft,chewy dough and a subtle,smoky crust. Mastering homemade German pretzels is more than just following a recipe; it’s an art that transforms simple ingredients into an iconic treat steeped in tradition. Whether your craving a comforting snack for a cozy afternoon or aiming to impress guests with authentic European flair, this guide will take you step-by-step through the secrets to achieving that signature texture and flavor. Prepare to roll up your sleeves and embark on a appetizing journey toward soft, chewy, and downright delicious homemade pretzels that rival any bakery’s finest.
Mastering Homemade German Pretzels: Soft, Chewy & Delicious
mastering homemade German pretzels: soft, chewy & delicious is a journey that starts with selecting the perfect flour and ingredients to capture that signature pretzel texture and flavor. The magic lies not only in the dough but in understanding the secrets behind kneading,proofing,shaping,and baking. Whether you’re craving a warm snack straight from your oven or a unique treat to impress family and friends,this recipe empowers you to craft authentic pretzels with confidence and flair.
Prep and Cook Time
- prep Time: 30 minutes
- Proofing Time: 1 hour 15 minutes
- Baking Time: 15 minutes
- Total Time: Approximately 2 hours
Yield
Makes 8 large, soft German pretzels
Difficulty Level
Medium – Requires attention to detail but beginner-kind with a bit of practice
Ingredients
- 4 cups all-purpose flour, sifted
- 1 ½ cups warm water (100-110°F / 38-43°C)
- 2 ¼ teaspoons active dry yeast (1 packet)
- 2 tablespoons granulated sugar
- 1 teaspoon fine sea salt
- 3 tablespoons unsalted butter, melted and slightly cooled
- 10 cups water (for baking soda bath)
- 2/3 cup baking soda
- Coarse pretzel salt (or flaky sea salt) for sprinkling
Instructions
- Activate the yeast: In a small bowl, stir the warm water with sugar and yeast. Let it sit for 5-7 minutes until frothy and bubbly, signaling active yeast.
- Prepare the dough: In a large mixing bowl, combine the sifted all-purpose flour and salt. Make a well in the center and pour in the yeast mixture along with melted butter. Mix with a wooden spoon or dough hook attachment until the dough starts coming together.
- Knead the dough: Transfer to a lightly floured surface and knead for 8-10 minutes until smooth, elastic, and no longer sticky. Alternatively, use a stand mixer with dough hook on medium speed.
- First proof: Lightly grease a large bowl with butter, place the dough inside, and cover with a clean kitchen towel or plastic wrap. Let it rise in a warm, draft-free surroundings for about 1 hour or until it doubles in size.
- Prepare the baking soda bath: Preheat the oven to 450°F (232°C). In a large, wide pot, bring 10 cups of water and the baking soda to a gentle boil, taking care to avoid overflow.This bath is crucial for the classic pretzel crust.
- Divide and shape: Punch down the dough gently to release air. Divide into 8 equal pieces and roll each piece into a 20-inch rope. Form each rope into the iconic pretzel shape by crossing the ends twice and pressing them onto the bottom of the loop to seal firmly.
- Bake the pretzels: Using a slotted spatula, dip each pretzel into the boiling baking soda bath for 20-30 seconds, flip, and submerge the other side. remove and place on a parchment-lined baking sheet.
- Add finishing touches: promptly sprinkle with coarse pretzel salt. For a softer crust,brush lightly with melted butter before baking.
- Bake: Bake for 12-15 minutes, or until deep golden brown. Rotate the pans halfway for even browning.
- Cool and enjoy: Transfer the pretzels to a wire rack. Enjoy warm for best softness with a classic chewy bite.
Chef’s Notes and Tips for Success
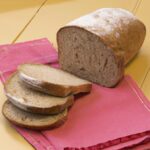
- Flour selection: Use high-quality all-purpose flour with a moderate protein content (10-12%) for the best balance between softness and chewiness. Bread flour can be used for a firmer, chewier texture, but avoid cake or pastry flour as it lacks sufficient gluten.
- Temperature matters: Keep water warm but not hot when activating yeast. Too hot will kill the yeast; too cold slows proofing.
- Kneading: Proper kneading develops gluten, resulting in that unmistakable chew.don’t rush this step.
- Shaping practice: Don’t worry about perfection on your first attempt. The signature pretzel shape comes with practice. For visual guidance, refer to our Pretzel Shaping Guide.
- Baking soda bath: this alkaline bath is what gives pretzels their distinctive crust and rich brown color. It’s a traditional technique that can’t be skipped or substituted easily.
- Storage: Store cooled pretzels in an airtight container at room temperature for up to 2 days. Reheat in a 350°F (175°C) oven for 5 minutes to refresh softness.
- Gluten-free choice: Experiment with a gluten-free flour blend designed for bread, but results will vary and shaping may be more delicate.
Serving Suggestions
These pretzels shine when served warm alongside a small bowl of classic yellow mustard, creamy cheese dip, or a tangy honey mustard. A garnish of finely chopped fresh herbs like chives or parsley can add a fresh contrast and visual appeal. For an indulgent twist, try brushing with garlic butter and sprinkling with Parmesan after baking. Pair with a crisp, non-alcoholic apple cider for a true German-inspired snack experience.

Nutritional Details (per pretzel)
| Calories | Protein | Carbs | Fat |
|---|---|---|---|
| 210 | 6g | 40g | 3g |
For more inspiration on traditional German baked goods, explore The Kitchn’s History of Pretzels.
Q&A
Q&A: Mastering Homemade German Pretzels - Soft, Chewy & Delicious
Q1: What makes a traditional German pretzel different from regular soft pretzels?
A1: Traditional German pretzels, or Brezn, have a distinctively darker crust and a unique knot shape. This is largely thanks to the classic lye bath (alkaline water) they’re dipped in before baking, which gives that signature deep mahogany color and slightly crisp exterior while keeping the inside soft and chewy.
Q2: I’ve heard about using a lye bath for pretzels. can I substitute it with something safer at home?
A2: Absolutely! While food-grade lye (NaOH) is traditional, it requires careful handling. many home bakers use a baking soda bath as a safer alternative. Boiling the pretzels briefly in a baking soda solution helps mimic the alkaline environment, producing the classic crust and flavor-soften that knot and prepare for some browning magic!
Q3: What’s the secret to perfectly soft and chewy pretzels?
A3: The magic lies in the balance of ingredients and technique. Use high-protein bread flour for chewiness, a touch of butter or oil to keep softness, and don’t overwork the dough to maintain a light texture. The alkaline bath sets the crust, and a quick steam in the oven or spraying water before baking can keep the interior tender.
Q4: How do I shape pretzels like a pro? Any tips for beginners?
A4: Start with a generous length of dough, roughly 18-24 inches. Roll it out until it’s about the thickness of a pencil, then form a “U” shape, cross the ends twice, and fold them down to meet the bottom of the “U,” pressing gently to seal. It takes practice, but don’t worry-every pretzel will have its own charm!
Q5: What toppings can I add to make my pretzels extra special?
A5: Traditional coarse pretzel salt is a must for that authentic crunch and salty punch! Feel adventurous? Try sprinkling with toasted sesame seeds, poppy seeds, or even a brush of garlic-herb butter right after baking for a flavor boost. Sweet versions can be dusted with cinnamon sugar-perfect for a dessert twist.
Q6: Can pretzel dough be prepared ahead of time? What’s the best way to store it?
A6: Yes! Pretzel dough can be made in advance and refrigerated for up to 24 hours, allowing the flavors to develop. Just cover it tightly and bring it back to room temperature before shaping and baking. For longer storage, freeze shaped pretzels on a baking sheet, then transfer to a sealed bag and bake straight from frozen-adding a couple extra minutes for oven time.
Q7: Is it possible to make pretzels without yeast?
A7: traditional pretzels depend on yeast to achieve that airy, chewy crumb. For a no-yeast version, quick breads or soda bread techniques can mimic some texture, but the taste and character won’t be quite the same. To truly master German pretzels, a little yeast patience is your best friend!
Q8: How can I get that shiny, deep brown crust without burning the pretzels?
A8: timing and temperature are key! The baking soda or lye dip jump-starts browning.Bake at a hot oven, around 425°F (220°C), and keep a close eye. A quick spray or brush of water before baking creates steam that yields a glossy crust without excess charring. Remember, every oven is different-small adjustments can make a big difference!
Ready to roll up your sleeves and bring the warm aroma of freshly baked german pretzels into your kitchen? With these tips, you’re on your way to creating soft, chewy, and irresistibly delicious homemade treats-no pretzel shop required!
in summary
Mastering the art of homemade German pretzels opens a world where kitchen alchemy transforms simple ingredients into golden, glossy treasures that delight the senses. With each chewy, soft bite, you’re not just enjoying a snack-you’re savoring a tradition steeped in history and crafted with care. As you perfect your technique, remember that the beauty of baking lies as much in the journey as the result.So roll up your sleeves,embrace the dough’s texture,and let your oven work its magic. Soon enough, your homemade pretzels will be the centerpiece of any gathering-warm, inviting, and irresistibly delicious. Happy baking,and may your pretzels always rise to the occasion!