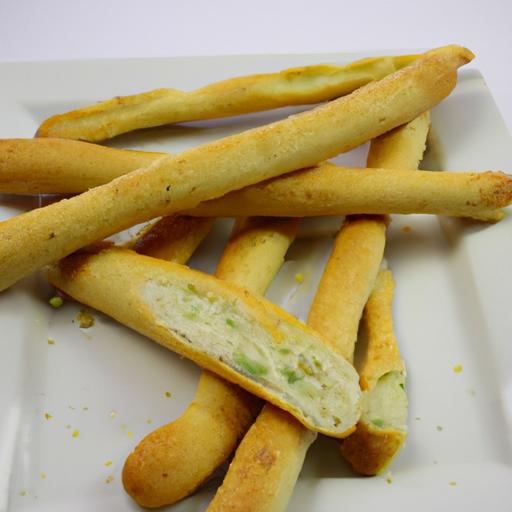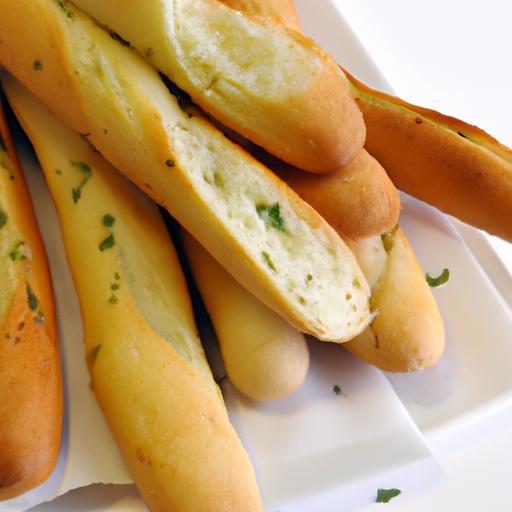
There’s something undeniably comforting about sinking your teeth into those soft, buttery Olive Garden breadsticks-the perfect companion to a hearty bowl of pasta or a crisp salad. But what if you could bring that warm, garlicky goodness right into your own kitchen anytime you please? Unlock the secret behind this beloved Italian-American staple with our easy-to-follow copycat Olive Garden breadsticks recipe. From the pillowy texture to the perfect sprinkle of herbs,we’ll guide you step-by-step to recreate these iconic breadsticks that will have your family and friends asking for seconds-no restaurant visit required.Get ready to roll up your sleeves and bake your way to breadstick bliss!
Unlock the Secret: Copycat Olive Garden Breadsticks Recipe begins with the art of perfecting dough that feels feather-light yet holds a soft, pillowy crumb inside a delicately crisp exterior.These iconic breadsticks have inspired countless home bakers to recreate their unique texture and irresistible flavor-offering a comforting, buttery taste that pairs beautifully with a robust garlic butter glaze. My journey with this recipe started one chilly evening craving that familiar breadstick warmth, and mastering these elements has truly elevated every bite.
Prep and Cook Time
- Prep Time: 20 minutes (plus 1 to 1.5 hours for dough rising)
- Cook Time: 12-15 minutes
Yield
Makes approximately 12-14 breadsticks, perfect for sharing with family or guests.
Difficulty Level
Medium – This recipe requires some patience with dough rising and glazing but is approachable for bakers familiar with yeast bread.
Ingredients
- 2 ¼ teaspoons active dry yeast (one 7g packet)
- 1 ½ cups warm water (110°F/43°C)
- 4 cups all-purpose flour, sifted
- 2 tablespoons granulated sugar
- 2 teaspoons kosher salt
- 2 tablespoons unsalted butter, melted (plus extra for brushing)
- 1 tablespoon olive oil, for dough and baking sheet
- 4 cloves garlic, finely minced
- 1 teaspoon garlic powder
- 1 teaspoon dried parsley flakes
- Coarse sea salt, for sprinkling
instructions
- Activate the yeast: In a large mixing bowl, combine warm water, sugar, and yeast. Let sit for 5-7 minutes until frothy.This step is critical to ensure a lively dough rise.
- Make the dough: Add melted butter, olive oil, and kosher salt to the yeast mixture, stirring gently. Gradually mix in sifted flour, one cup at a time, until a shaggy dough forms. Transfer to a floured surface and knead for 8-10 minutes until smooth and elastic. (Tip: If dough is sticky, dust lightly with flour; avoid adding too much to keep softness.)
- Frist rise: Lightly oil a large clean bowl. Place dough inside and cover tightly with plastic wrap or a damp towel. Allow to rise in a warm, draft-free environment for 60-90 minutes, until doubled in size.
- Shape the breadsticks: Punch down dough gently and divide into 12-14 even pieces. Roll each into 6-7 inch ropes, tapering slightly at ends. Place spaced on an olive-oiled baking sheet, leaving room to expand.
- Second rise: Cover breadsticks loosely with a clean kitchen towel. Let rest and rise again for 30-45 minutes. This extra proof builds the soft interior.
- Prepare garlic butter glaze: In a small saucepan over low heat, melt additional 2 tablespoons of butter. Add minced garlic, garlic powder, and parsley flakes.Simmer gently for 2-3 minutes until fragrant but not browned. Remove from heat and set aside.
- Bake: Preheat your oven to 400°F (205°C). Brush each breadstick generously with the garlic butter glaze, then sprinkle sea salt on top. Bake in the center rack for 12-15 minutes, rotating halfway, until golden brown and crisp on the surface.
- Finishing touch: Instantly upon removal from the oven, brush breadsticks again with reserved garlic butter glaze for an extra burst of flavor and irresistible shine.
- Serve warm: Share your golden breadsticks right away for the best moist texture and aromatic experience.
Tips for Success
- Dough texture is key: Avoid over-flouring to keep breadsticks tender. The dough should be slightly tacky but manageable.
- Warm environment: Ensure your rising spot is draft-free around 75°F; slight warmth encourages yeast activation without risking overproofing.
- Garlic butter glaze: Use fresh garlic for the most vibrant aroma; if preferred, swap parsley for fresh oregano or basil for a herby twist.
- Make ahead: Prepare dough the night before, refrigerate after first rise, and shape the next day for fresher results.
- Storage: Store cooled breadsticks in an airtight container at room temperature for up to 2 days. Reheat in a warm oven covered with foil to regain softness.
Serving Suggestions
These breadsticks are the perfect companion to tomato-based pasta dishes or a creamy homemade marinara for dipping. Garnish with a sprinkle of fresh parsley or a dusting of grated Parmesan to enhance presentation. For a festive touch, serve alongside a chilled glass of sparkling water with lemon or a crisp non-alcoholic beverage. Arrange them stacked artfully in a rustic basket lined with a linen napkin to capture that warm Olive Garden vibe at home.
| Nutrition per breadstick | Calories | Protein (g) | Carbs (g) | Fat (g) |
|---|---|---|---|---|
| 1 piece (approx.) | 140 | 4 | 22 | 4 |

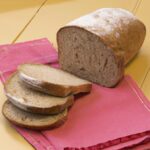
For further inspiration on Italian bread recipes, see our homemade Italian Bread Recipe. To deepen your understanding of yeast dough science, the King Arthur Baking Guide is an excellent resource for perfecting your techniques.
Q&A
Q&A: Unlock the Secret – Copycat Olive garden Breadsticks Recipe
Q1: What makes Olive Garden’s breadsticks so irresistibly flavorful?
A1: It’s all about the perfect balance of soft, fluffy dough with a golden, slightly crisp top, brushed generously with a buttery garlic spread and sprinkled with just the right amount of garlic salt and Italian herbs. That simple yet flavorful combo creates that iconic comfort-food taste.
Q2: Can I really recreate that texture and flavor at home?
A2: Absolutely! The secret lies in using warm water and yeast to create a light, airy dough, letting it rise properly, and finishing with a garlic butter glaze right out of the oven. With a bit of patience and the right ingredients, you’ll have breadsticks that rival the restaurant’s.Q3: What ingredients do I need for a copycat Olive Garden breadsticks dough?
A3: The basics include all-purpose flour, active dry yeast, warm water, a touch of sugar to activate the yeast, salt, olive oil or a neutral oil, and butter for that final buttery brush. Fresh or dried Italian herbs like parsley or oregano elevate the flavor perfectly.
Q4: How important is the rising time for the dough?
A4: Very important! Allowing the dough to rise until it doubles in size creates that soft, pillowy interior. Skipping or rushing this step can result in dense breadsticks that don’t have the trademark lightness.
Q5: What’s the best way to shape the breadsticks?
A5: After the dough has risen, divide it into even pieces and roll each into a smooth stick roughly six inches long. Place them on a baking sheet with a little space to allow for expansion during baking.
Q6: Should I bake the breadsticks on parchment paper or a plain baking sheet?
A6: Both work well, but parchment paper helps prevent sticking and makes clean-up easier. It also ensures the bottoms bake evenly without getting too brown.
Q7: how do I get that perfect golden color and a soft top crust?
A7: Brushing the breadsticks with melted butter before baking helps achieve that golden sheen. After baking, immediately brush again with a warm garlic butter mixture to keep them moist and flavorful.
Q8: Can I customize the garlic butter topping?
A8: Definitely! While the classic recipe uses melted butter mixed with garlic powder and Italian herbs, you can add a pinch of crushed red pepper flakes for a mild kick or fresh minced garlic for a more intense garlic punch.
Q9: How should I store leftover breadsticks?
A9: Store cooled breadsticks in an airtight container or zip-top bag at room temperature for up to two days. To revive them, pop them in a warm oven for a few minutes to regain that fresh-baked softness.
Q10: Can these breadsticks be frozen?
A10: Yes! Freeze the unbaked dough sticks on a baking sheet, then transfer to a freezer bag once solid. Bake straight from frozen, adding a few extra minutes to the baking time. Brush with garlic butter right after baking for that fresh-from-the-oven flavor.
Q11: Any tips for making these breadsticks kid-friendly and appealing to picky eaters?
A11: Keep it simple-reduce or omit herbs if needed, and focus on a rich garlic butter base. Pair with a side of marinara sauce for dipping to add a fun and interactive element that kids love.
Q12: What’s the best way to enjoy homemade olive Garden-style breadsticks?
A12: Serve warm, ideally fresh out of the oven with a savory tomato sauce or alongside your favorite soup or salad. They’re perfect for sharing and bring that cozy restaurant vibe right to your table!
Unlocking this breadstick secret means you can now savor the iconic Olive Garden experience anytime-all from the comfort of your kitchen. Happy baking!
Concluding Remarks
Now that you’ve uncovered the secret to recreating Olive Garden’s iconic breadsticks right in your own kitchen, there’s no need to wait for a restaurant trip to satisfy that craving. With a few simple ingredients and a touch of patience, you can enjoy warm, buttery, garlicky goodness anytime you want. So roll up your sleeves, embrace the dough, and watch as your homemade breadsticks transform from humble ingredients into golden bites of comfort. Happy baking-and even happier snacking!